I'll give you some scenarios where you guys have to sit and do a lot of work to get your work done. You have some pictures which you clicked at last night's party. They're all in your camera's native resolution. They're freakin' huge to upload anywhere on the internet ! What and how will you resize them ? Can't think of anything ? Okay, lets begin !
Today's Automator Action: Resize Photos
• Put the pictures into a folder
• Select all the pictures
• Alternate click on any one photo
• Move the cursor to "More"
• Now, move it to "Automator"
• Click on "Create Workflow"
Now that you've done all that, an Automator window should pop up on your screen. You see too many things and you're dazed and confused ! Here's what you need to do again:
• Look toward the left side of the Automator window
• There should be an open drop down called "Library" with names like "Calendar, Contacts..." and so on
• Since you're working on Photos, you need to select the "Photos" sub menu in the Library menu
• Now you see more options to the right of the Library menu
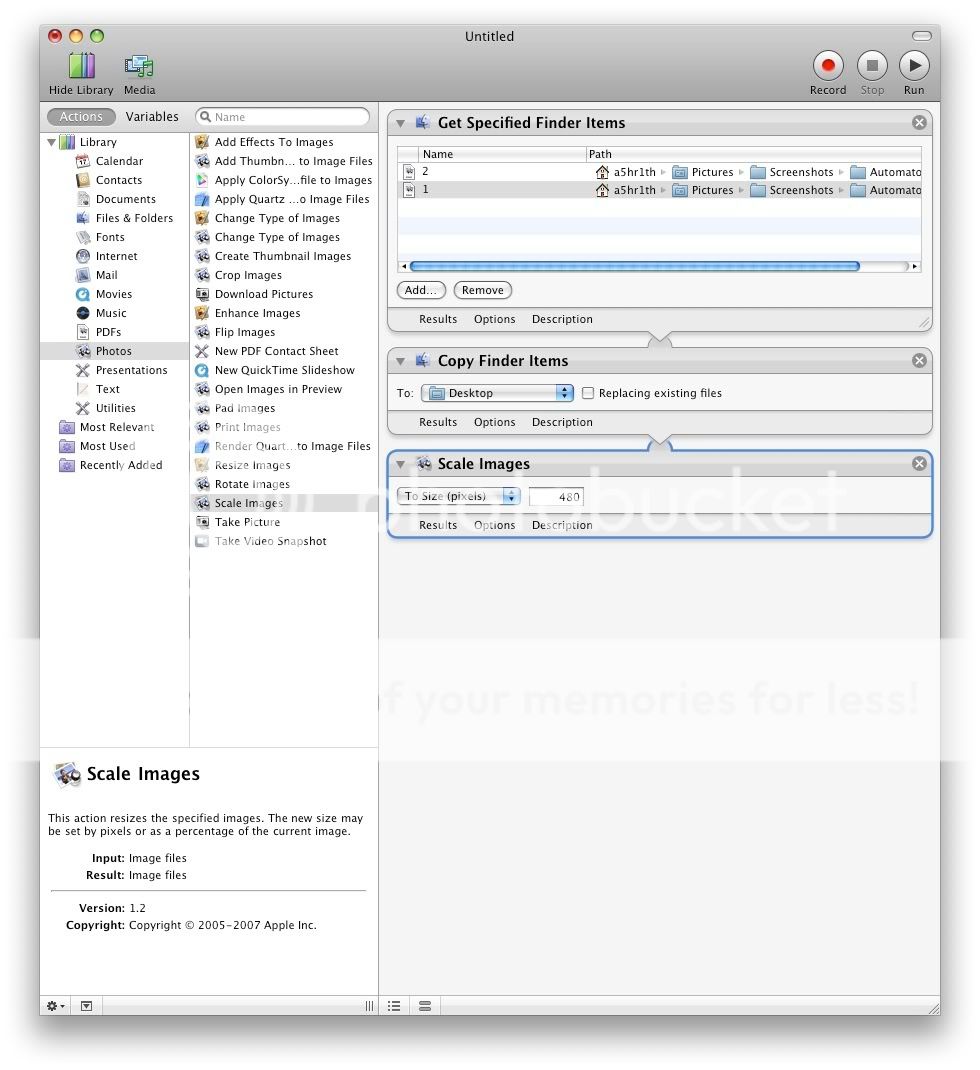
• Select "Scale Images"
• Double click on "Scale Images" after you select it
• Automator will ask you if you want your original photos to be preserved after you scale them
• Depending on your choice select whatever you want
• One more sub menu which itself is called "Scale Images" opens up to the right side of "Scale Images"
• Select the type of scaling you want
• Now select "Run" in the top right corner of the Automator window
• Sit back and relax while Automator processes your images !
5 comments:
Very nice tutorial never bothered exploring Automater too much
Thank you saar :)
This is fuckin brilliant tutorial.I had never bothered to check what this automator does.It was lying in my apps idle for more than a year.Now i knw how to make the best use of this tool.
Thanks a ton for taking out ur time and putting out this tutorial for ppl who have mac but dont knw how to take the best use of the installed applications.
Cheers and looking forward for more from u man.
Post a Comment